
Last updated November 18, 2026








Free written scope consultation - allowances, timeline, and change-order rules on paper before a single trade is scheduled
Bathroom Remodeling Maintenance Schedule: What to Do and When
Silicone caulk in a shower needs to be checked at the six-month mark and replaced the moment you see separation. Most homeowners wait until water is staining the ceiling below before they think about it. That gap between “still looks fine” and “this is now a repair” is where a remodeled bathroom quietly loses value. In Winchester, where our water runs hard and our summers pull moisture out of everything, a new bathroom can look tired in three years or hold up for fifteen. The difference is a calendar, not luck. This guide lays out the month-by-month schedule for year one, the quarterly rhythm after that, and the exact products to buy so you aren’t guessing in the aisle at the hardware store.
Quick Answer
Inspect and re-caulk your shower at month six, reseal grout and stone at month twelve, and clean your exhaust fan every three months from day one. After the first year, move to a quarterly routine: check caulk lines, descale fixtures, inspect the fan, and look for loose grout. Skipping the fan is what causes most mold and peeling paint in remodeled bathrooms.
Styles & brands we work with
- Kitchen remodeling
- Bathroom remodeling
- Home additions & ADU
- Roofing
- Windows & doors
- Driveway & pavers
- Fence
Table of Contents
- Why the First Year Decides Everything
- The Month-by-Month Calendar for Year One
- Quarterly and Annual Schedule for Years Two and Beyond
- Hard Water in Winchester: Descaling, Glass, and Grout Sealing
- The Exhaust Fan: Your Most Neglected Maintenance Item
- What Voids a Warranty vs. What’s Just Good Practice
- Product Guide: Sealers, Caulk, and Glass Treatments
- Common Mistakes to Avoid
Why the First Year Decides Everything
A bathroom remodel settles in like a new house. Materials expand and contract through their first full seasonal cycle, which in Winchester means a dry, hot summer and a cooler, wetter winter. Grout cures, caulk cures, and the framing around your shower shifts slightly as humidity swings. Everything that’s going to move does most of its moving in those first twelve months.
That’s why the first year isn’t about deep cleaning. It’s about catching the small separations before they become moisture paths. A hairline gap in the caulk where the shower wall meets the floor pan lets water into the assembly behind the tile. Once it’s in there, you’re not looking at a caulk job anymore. You’re looking at a tear-out.
In our experience across bathroom remodeling in Winchester, the projects that age well aren’t the ones with the most expensive tile. They’re the ones where someone checked the caulk in month six. The material matters, but the maintenance rhythm matters more.
Here’s the good news: the first-year schedule is short. You’re spending maybe two hours total across the whole year if you stay on top of it. The cost of skipping it is measured in thousands.
The Month-by-Month Calendar for Year One
This is the schedule we walk clients through at project close. Print it, screenshot it, set phone reminders. None of these tasks take more than twenty minutes except the ones that call for a full shower dry-out.
- Month 1: Do nothing but observe. Let materials cure. Take photos of every caulk line and grout joint so you have a “before” reference for later comparison.
- Month 3: Clean the exhaust fan grille and vacuum the blades. Wipe down the shower glass with a squeegee after every use starting now. Check that the toilet isn’t rocking at the base.
- Month 6: Inspect every silicone caulk joint in the shower, around the tub, and at the sink backsplash. Press a fingernail into the caulk. If it’s hard, cracked, or pulling away from either surface, cut it out and replace it. This is the single most important month on the calendar.
- Month 9: Descale the showerhead and faucet aerators by soaking them in white vinegar for an hour. Check the toilet flapper for a slow leak by adding food coloring to the tank and waiting fifteen minutes.
- Month 12: Reseal the grout and any natural stone with a penetrating sealer. Re-inspect caulk lines and replace anything that failed its six-month check. Deep clean the exhaust fan housing and confirm the damper opens and closes freely.
That’s it for year one. If you did the month-six caulk check and the month-twelve seal, you’ve done more than most homeowners ever do, and your bathroom will show it ten years from now.
Quarterly and Annual Schedule for Years Two and Beyond
Once the materials have settled, the maintenance load drops and the rhythm changes. We recommend a quarterly sweep plus one bigger annual task. Here’s the split.
Every quarter:
- Walk the caulk lines with a flashlight. Look for separation, discoloration, or soft spots.
- Clean the exhaust fan grille and vacuum around the blades.
- Descale the showerhead, faucet aerators, and any glass shower door tracks.
- Check the toilet base for rocking, and the supply line for corrosion.
- Look at the grout. Any joint that’s crumbling or has gone darker than its neighbors is holding water.
Once a year:
- Reseal grout and natural stone with a penetrating sealer.
- Remove and clean the exhaust fan cover; vacuum the housing.
- Re-caulk any joints that showed wear during the quarterly checks. Don’t wait for a leak.
- Inspect the shower pan for movement or softness underfoot.
- Check under-sink cabinetry for moisture, especially the cabinet floor around the supply lines.
Fifteen minutes per quarter, one afternoon per year. That’s the whole trade-off for a bathroom that looks new a decade from now.
Hard Water in Winchester: Descaling, Glass, and Grout Sealing
Winchester’s water runs on the hard side, and if you’ve lived here any length of time you already know it. You see it as white spotting on the shower glass, crust on the faucet aerator, and a dull film on tile that no amount of scrubbing seems to lift. Left alone, that mineral buildup etches glass and eats into grout.
Descaling fixtures. Fill a plastic bag with white vinegar, tie it around the showerhead, and leave it for an hour. Do the same with faucet aerators by unscrewing them and soaking them in a cup. Once a quarter is plenty. If you have a hand-held showerhead, unscrew the head from the hose and soak it fully.
Treating glass. A squeegee after every shower is the highest-value habit you can build. Beyond that, apply a glass treatment designed to repel mineral deposits, and reapply per the manufacturer’s schedule. Never use abrasive pads on coated glass. They scratch the coating and make the spotting worse.
Grout sealing frequency. In a hard-water market like Winchester, seal grout every twelve months rather than the two-year interval you see on some manufacturer labels. Test a joint by dripping water on it: if the water beads up, the sealer is working; if it soaks in, it’s time. Natural stone like marble or travertine needs sealing every six to twelve months depending on the stone.
The Exhaust Fan: Your Most Neglected Maintenance Item
Your exhaust fan is the single most important piece of equipment in a remodeled bathroom, and it’s the one nobody touches. A fan that’s clogged with dust moves half the air it’s rated for. A fan that’s rated for the room but vents into an attic instead of outdoors does nothing at all except push moisture somewhere worse.
Here’s why it matters. Every shower loads the room with moisture. If the fan can’t clear it, that moisture lands on the ceiling, the walls, the trim around the door, and the grout. Over months, that’s mold bloom on the ceiling and paint failure around the room perimeter. Every remodeled bathroom with a paint problem we’ve been called to look at has an exhaust fan that either wasn’t running or wasn’t working.
The maintenance is simple:
- Every three months, pull the fan grille (most pop off without tools) and vacuum the blades and housing.
- Once a year, remove the fan cover and vacuum the damper assembly. Confirm the damper flap opens when the fan runs and closes when it stops. If it sticks, replace the fan.
- Test airflow with the tissue test. Hold a single square of toilet paper up to the grille while the fan runs. If it won’t hold, the fan isn’t moving enough air.
- Run the fan during every shower and leave it on for fifteen minutes afterward. That’s the period when the moisture leaves the room.
If the fan is more than ten years old or was sized for a smaller room, replace it. Modern fans are quieter and move more air than the model that came with the house.
What Voids a Warranty vs. What’s Just Good Practice
Not every maintenance task carries the same weight. Some items are built into material warranties, and skipping them can void your coverage. Others are best practice and keep the bathroom looking good without affecting warranty.
Warranty-critical tasks:
- Grout and stone sealing at the manufacturer’s recommended interval. Most sealers and stone warranties require documented sealing.
- Promptly replacing failing caulk. If a manufacturer can show that a leak came through a joint you left failed, the leak isn’t their problem.
- Keeping the exhaust fan running and in working condition. Some ventilation-equipped fixture warranties require adequate air movement.
- Using only the cleaning products approved by the surface manufacturer. Abrasive cleaners on stone or coated glass void coverage.
Best-practice tasks:
- Squeegeeing the shower after each use.
- Descaling fixtures quarterly.
- Cleaning the sink trap and inspecting the toilet flapper.
- Vacuuming the fan grille on a schedule.
The distinction matters because product warranties get denied when a manufacturer can trace a failure to skipped maintenance. Keep a simple log of when you sealed grout and replaced caulk, with the product name and date. If you ever need to file a claim, you’ll have the answer ready.
Product Guide: Sealers, Caulk, and Glass Treatments
You shouldn’t have to guess at the hardware store. Here’s what to buy and what to avoid.
Grout sealer. Choose a penetrating sealer, not a topical coating. Penetrating sealers soak into the grout and block water without leaving a film. Topical sealers peel. For natural stone, use a sealer rated for that specific stone; an all-purpose sealer on limestone can discolor it. Brands like StoneTech and Aqua Mix make reliable penetrating products, and your tile manufacturer usually lists a recommended sealer on the spec sheet. Reapply every twelve months in Winchester’s hard water.
Silicone caulk. Buy 100% silicone for wet areas like the shower pan and tub perimeter. Silicone flexes, doesn’t shrink, and holds up to continuous moisture. Don’t buy “paintable” silicone blends for wet joints. They fail faster. Around dry areas like the backsplash meeting the wall, a paintable siliconized acrylic is fine. Remove old caulk completely before applying new; caulk over caulk doesn’t hold.
Glass treatment. A hydrophobic glass treatment repels water and mineral deposits and is worth applying to a new shower door. Reapply per the label, typically every six to twelve months. Pair it with a squeegee and a daily habit rather than relying on the coating alone.
Cleaning products. Use a pH-neutral cleaner for tile and stone. Skip anything with acid or a scouring ingredient on natural stone or coated glass. A microfiber cloth and a mild dish soap solution handle most bathroom cleaning without damage.
If you’re sourcing materials for a renovation in the first place, our team at general contractor in Winchester helps clients choose grout, tile, and fixtures that suit hard water and hold up over time. The brands on our roster, from Cambria and Silestone surfaces to Kohler and Moen fixtures, come with manufacturer documentation that spells out exactly what maintenance keeps the warranty intact.
Common Mistakes to Avoid
- Waiting for water damage before checking caulk. The whole point of a six-month inspection is to catch separation while it’s still a ten-minute fix. By the time you see a stain below the ceiling, the repair is a tear-out.
- Caulking over old caulk. New silicone won’t bond to old silicone. Cut it out entirely, clean the joint with denatured alcohol, and let it dry before reapplying.
- Ignoring the exhaust fan. A fan that isn’t running or isn’t clear of dust is the number-one cause of mold and paint failure in remodeled bathrooms. Test it with the tissue test every quarter.
- Using abrasive cleaners on stone or coated glass. Scouring powders etch stone and strip glass coatings, and both can void manufacturer coverage. Use pH-neutral products.
- Sealing grout too soon after installation. Fresh grout needs to cure for the manufacturer’s specified period, usually a few days, before sealer goes on. Sealing a damp joint traps moisture.
- Skipping the toilet base check. A rocking toilet wears the wax ring and lets water into the floor. Tighten the bolts and replace the ring at the first sign of movement.
- Not keeping a maintenance log. If you ever need to file a claim, a note of the last sealing date and product name is what saves the claim. A few lines on your phone is enough.
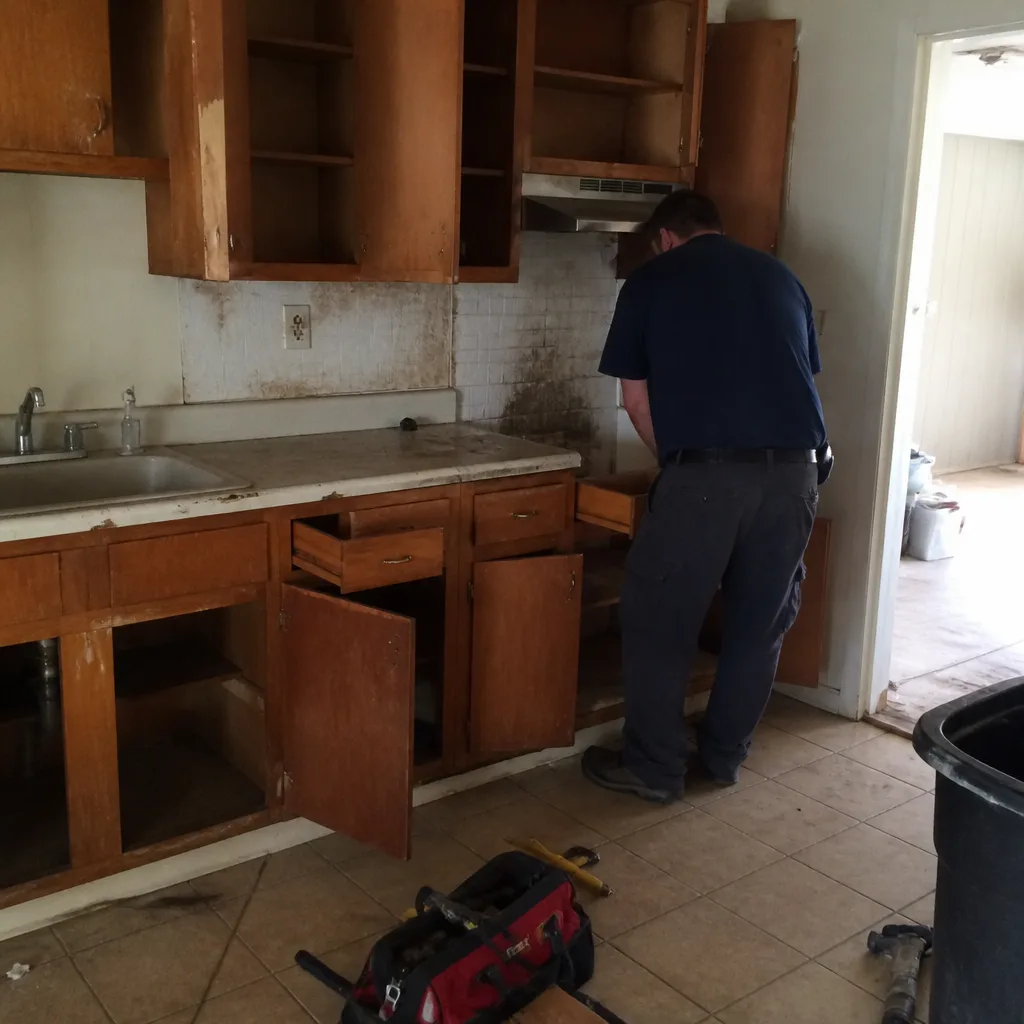
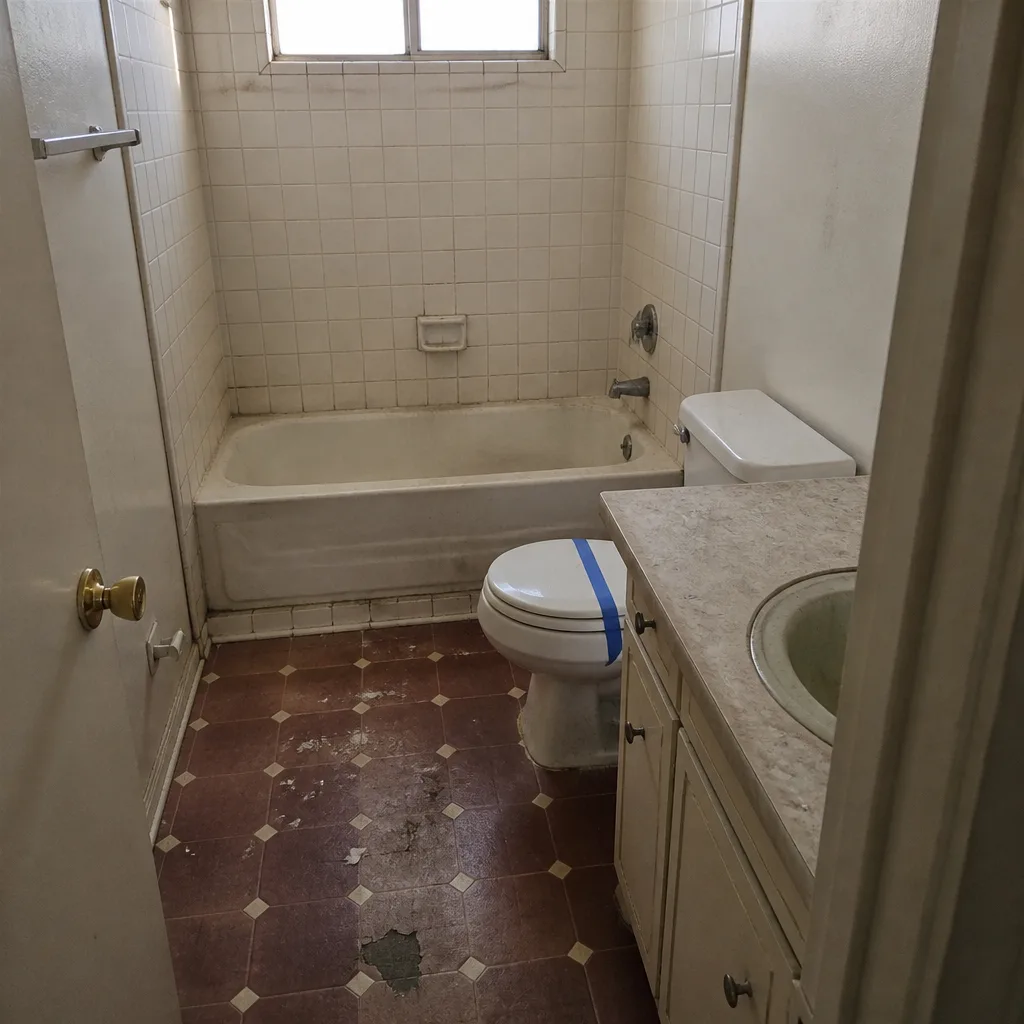
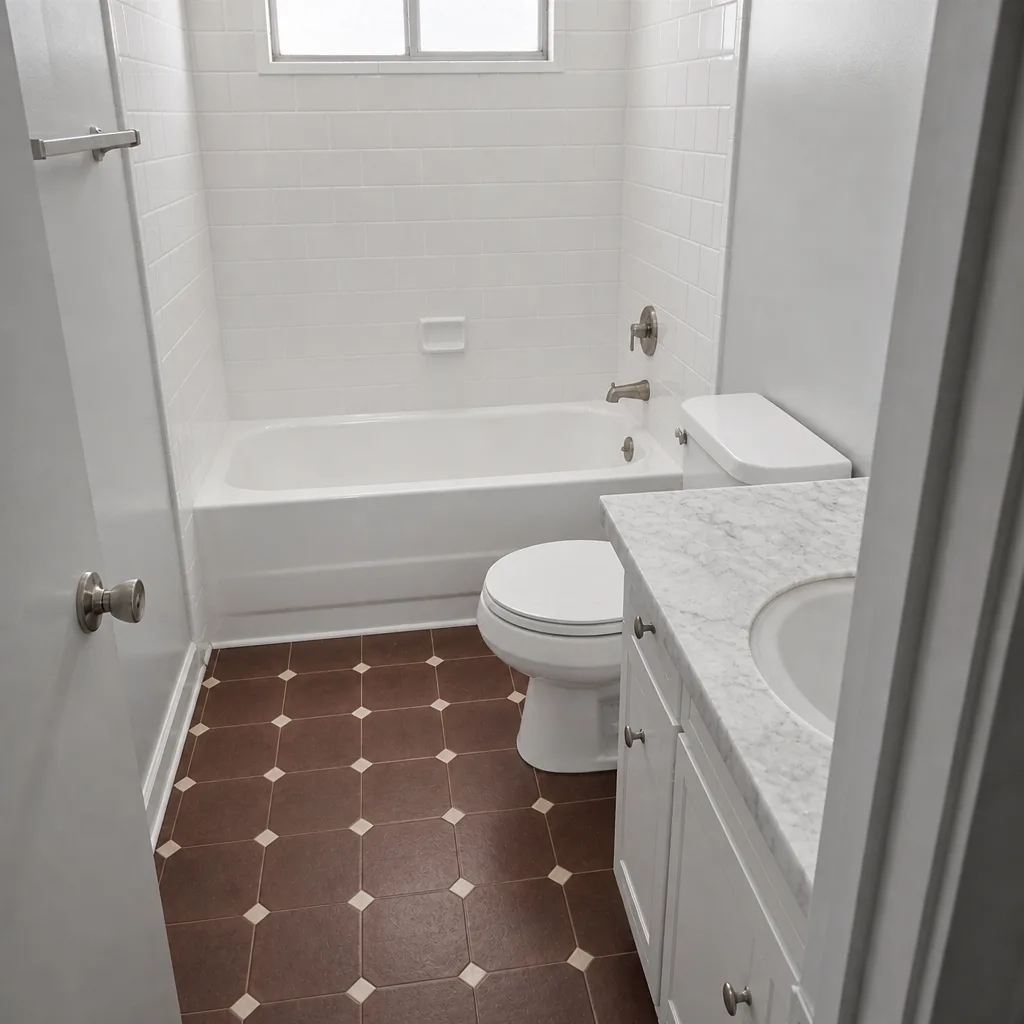
See the difference
 Before
 After
 Before
 After
 Before
 After
When to Call a Professional

Most of the tasks in this guide are homeowner-level. A few aren’t. Call a professional if you find soft spots in the floor or shower pan, grout that’s crumbling across multiple joints, water staining on the ceiling below the bathroom, or a shower pan that flexes underfoot. Those point to water already inside the assembly, and the repair is deeper than a caulk tube.
Call us if you’re unsure whether a joint needs replacement or just cleaning. We’d rather look at it now than demo a shower later. Sawyer Remodeling Winchester offers free estimates in Winchester, and our technicians have up to 21 years of experience reading what a bathroom is telling them. We bring background-checked, uniformed technicians, and the written price lands in your hands before any work starts. Call (888) 343-7097 to book a visit.
Frequently Asked Questions
Inspect caulk at six months and re-caulk at the first sign of separation, which in Winchester’s humidity swings is usually somewhere in the first year. After that, expect to re-caulk every two to three years if you’re using 100% silicone. Call (888) 343-7097 if you want us to look at a joint you’re not sure about.
Some tasks do. Grout and stone sealing at the manufacturer’s interval and keeping the exhaust fan running are common warranty conditions, and a manufacturer can deny a claim if maintenance was skipped. Best-practice tasks like squeegeeing glass don’t affect coverage. Keep a log of sealing dates and product names, and call us if you have questions about a specific warranty.
Every twelve months if your water runs hard, as Winchester’s does. That’s twice the interval you’ll read on most labels, but the label assumes softer water. Test a joint by dripping water on it: if it beads, the sealer is holding; if it soaks in, reseal.
Because a dusty fan moves half the air it’s rated for, and moisture it fails to clear lands on the ceiling and caulk lines. Vacuum the grille every three months and test airflow with the tissue test. A fan that won’t hold a tissue square needs replacement.
Most of it is homeowner-level: caulk checks, descaling, vacuuming the fan, and annual sealing. Bring in a professional for soft spots, crumbling grout across multiple joints, ceiling stains, or a flexing shower pan. Call (888) 343-7097 for a free estimate if you’re unsure what you’re looking at.
For a recently remodeled bathroom, an annual maintenance visit is worth it if you’d rather not track the schedule yourself. A trained eye catches joint failures and material wear before they become repairs. Sawyer Remodeling Winchester offers free estimates, so call (888) 343-7097 and we’ll price it in writing before any work begins.
The Bottom Line

A remodeled bathroom holds up for fifteen years if you give it about two hours of maintenance a year. The rhythm is simple: check caulk at six months, reseal grout at twelve, and keep the exhaust fan clean and running the whole time. In Winchester’s hard water and humidity swings, the calendar matters more than the material. We build every project with The Relay Visibility Guarantee, a written price before work starts, live arrival time tracking, and before-and-after photo updates, and we hand it over with a maintenance schedule so the work lasts. The 365-Day Done Right Promise backs every job for a full year. If it’s not done right, we make it right, in writing. If you’re planning a bathroom project, start with a Sawyer Remodeling Winchester home consultation. Thinking about a bigger renovation alongside it? Our team also handles a kitchen remodeling in Winchester, and we’re glad to scope both at once.
Call (888) 343-7097 to schedule your free estimate. We’ll walk your bathroom, answer your questions, and hand you a written price before anything begins.
Written by the team at Sawyer Remodeling Winchester.